How to clear CloudVeil DNS settings
1 min read
CloudVeil for Windows sets CloudVeil DNS servers by default and will reapply these settings by default if the filter is still running. Use these instructions to clear the DNS settings after removing the filter, or if you are using custom filter settings without CloudVeil DNS.
To change the DNS settings on your Windows computer, do the following: #
- Open Settings.
- Click on Network and Internet.
- Click on Change adapter options.
- Right-click the network interface connected to the internet, and select Properties.
- Select Internet Protocol Version 4 (TCP/IPv4) from the list.
- Click the Properties button.
- Click the Obtain DNS server address automatically option.
- Click OK.
- Click Close to apply the new DNS settings to the adapter.
How to Flush and Reset the DNS Cache #
You may still have to flush the DNS to make this work. Here’s how to do that:
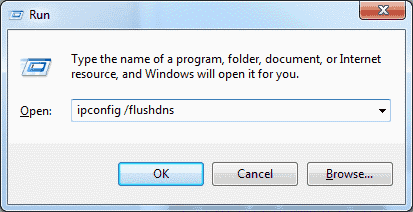
- Hold down the Windows key and press “R” to bring up the Run dialog box.
- Type
ipconfig /flushdnsthen press “Enter“. (be sure there is a space before the slash)
A command box will flash on the screen for a split second and the DNS Resolver cache is cleared.
Support: (888) 782-4962 9am to 5pm CST
support@cloudveil.org CloudVeil Chat
Protecting our families online since 2015. As followers of Christ, our eyes are on the future and its onslaught of tech challenges!
Actions
- Payment Methods
- Transfer / Install
- Report Bad Sites
- Test my Filter
- Reset Password


